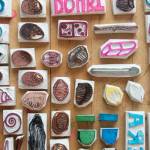
Techniques
Hand-carved Stamps: A Tutorial

Like your knitting, spinning, or crochet, hand-carved stamps bear a satisfyingly analogue trace of you: this increasingly airbrushed world needs that.
Then there’s the self-sufficient pleasure of being able to make any image you want—no matter how obscure or specific.
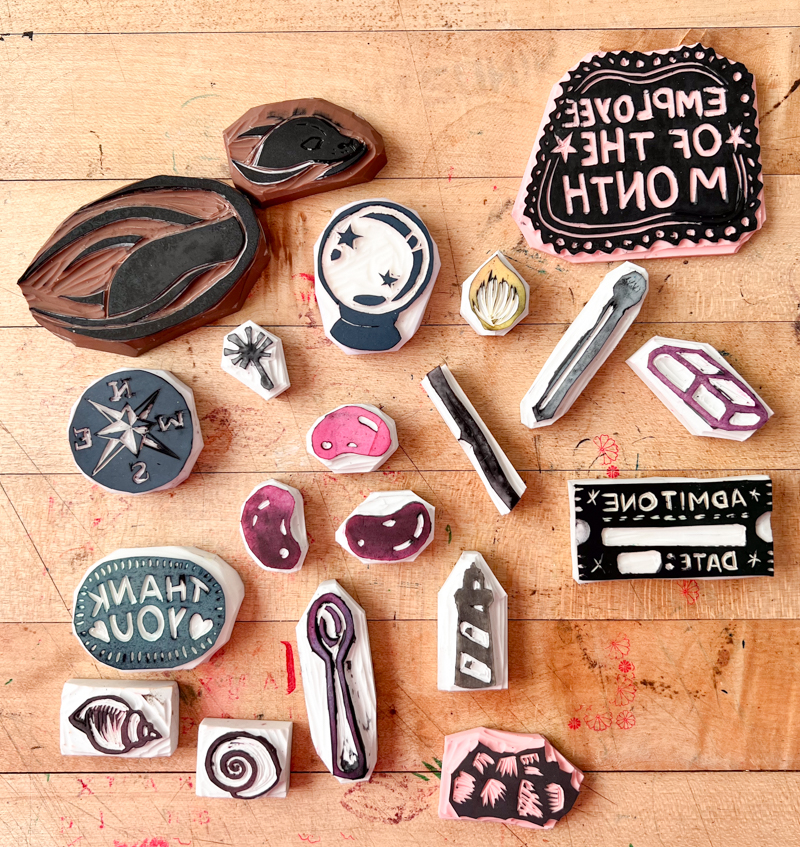
But perhaps the best thing is how stamps can celebrate the stories of your life.
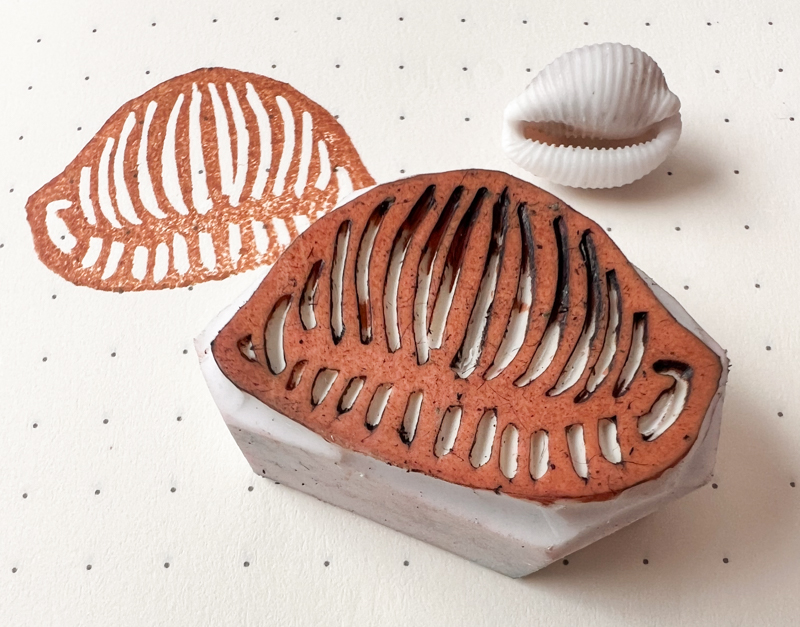
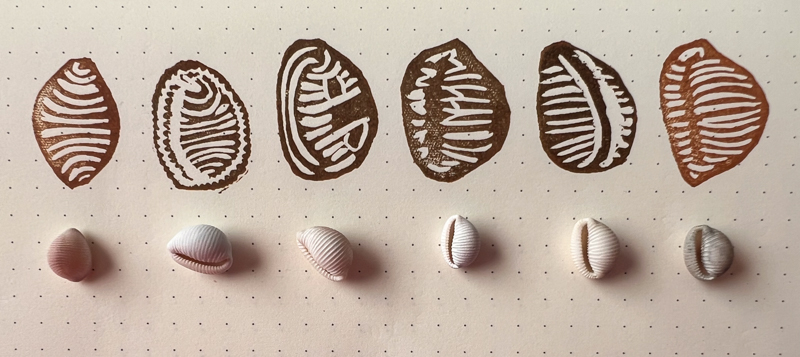
When my nephew found a cowrie (Trivia monacha) on our beach, I carved a stamp. Finding the shell is a moment he remembers and I’ll enjoy wrapping his presents this Christmas in cowrie paper and, perhaps, making a bookmark, too.
January 1 was an inauspicious start to 2025, spent repairing torn wire mesh on our chicken pen in a howling gale, whilst being slapped in the face by a wet tarpaulin. On January 2, we saw a seal whose gleaming ocean presence set a better tone for the year. I carved a stamp. It has popped up in my journal ever since, a joyful symbol of uplift and kindness.

Those of you taking my New Year class will meet this seal of approval in your printables! In fact, the method I’ll share here was used to make all the printable images.
Why not carve a stamp or two to add your own images to the ones supplied?
Here’s a basic how-to.
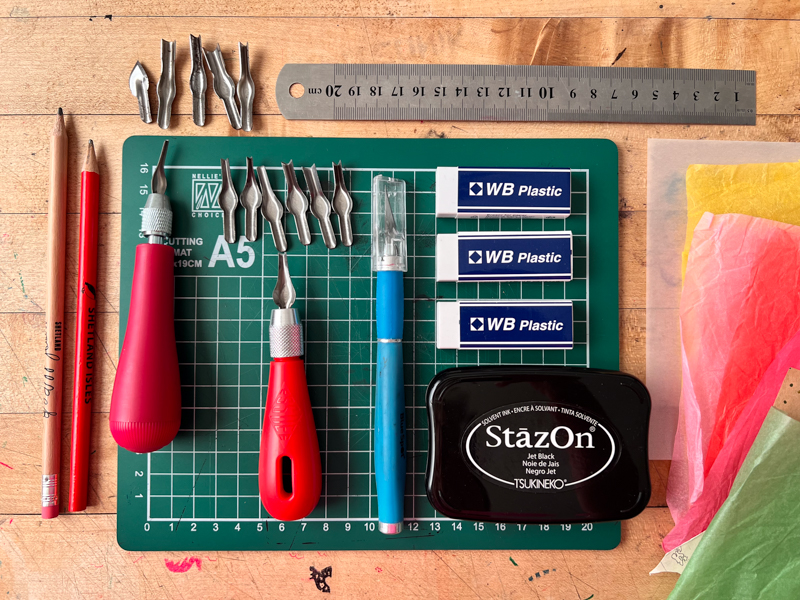
Supplies:
Lino-cutting tools: Essdee (UK) and Speedball (US) make good introductory sets with a handle and interchangeable cutters.
Erasers to carve: White pencil erasers (UK) and Paper Mate Pink Pearl (US) are great.
Ink pad(s): I love StaZon by Tsukineko.
Paper to stamp: tissue paper, magazine pages etc.
Tracing paper for transferring your design.
Softish pencil (2B – UK, #1 – US).
Cutting mat.
Exacto knife.
Metal ruler for straight lines when cutting erasers.
Design your stamp
If you’re feeling bold, draw straight onto your eraser with a pen and start carving right away.
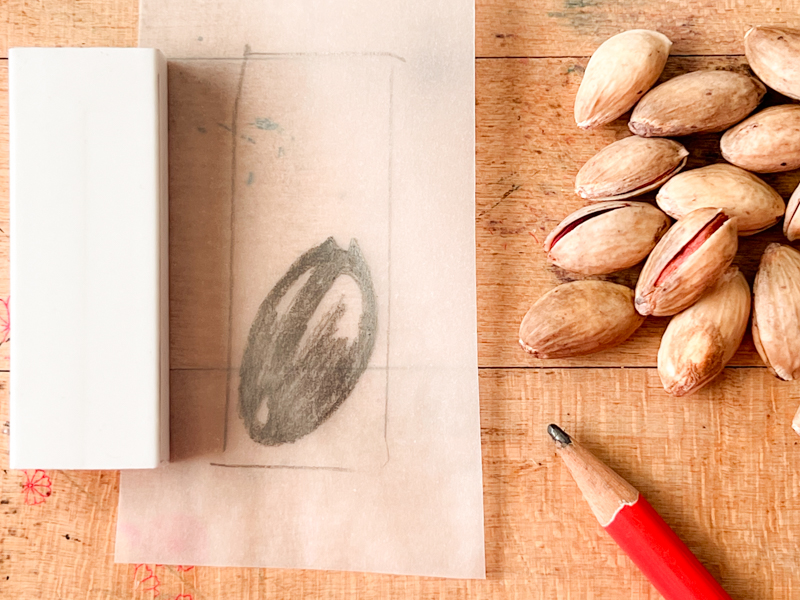
However, your stamp needs to be a mirror image of your design. If the image needs to be oriented a certain way—or if you’re using words—make life easier by drawing your design with a softish pencil on tracing paper first.
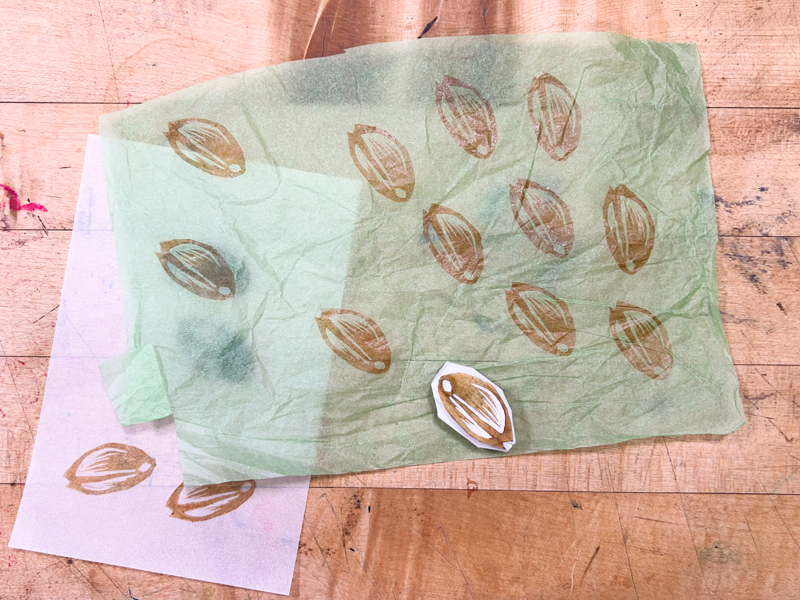
Draw thick lines and remember: when you carve your stamps, you’ll carve away the space around the lines and not the lines themselves. For my example, I’m drawing a pistachio from a pistachio farm we visited on our holidays.
Transfer your image
Once your design is drawn on the tracing paper, lay it on your eraser graphite-side down and rub the back firmly. Lift up the tracing paper: your design should have transferred directly onto your stamp and be a mirror image of your drawing.
![]()
If your design is smaller than your eraser, cut away the excess with an exacto knife and save for future stamp-making.
Carve your stamp
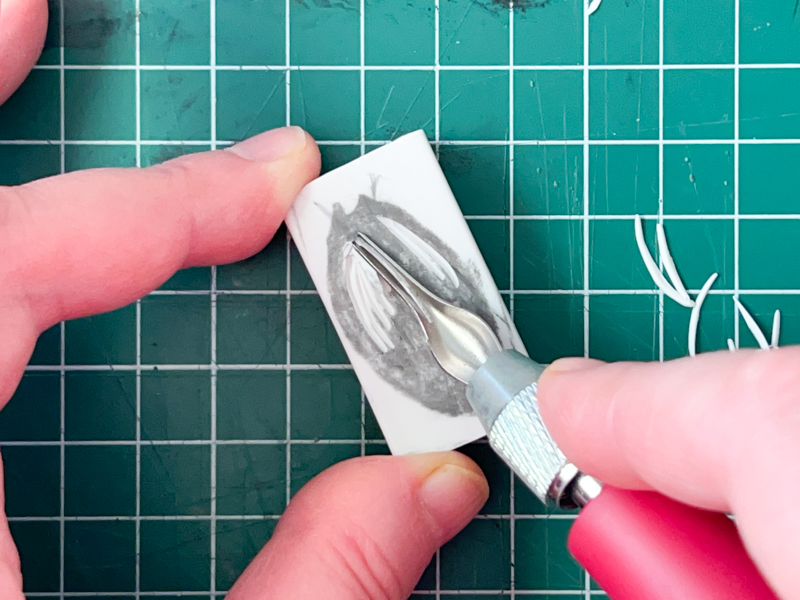
It takes time and practice to understand which cutters to use for different carving tasks but I’d suggest starting with a slim V-shaped cutter to get the fine details first…
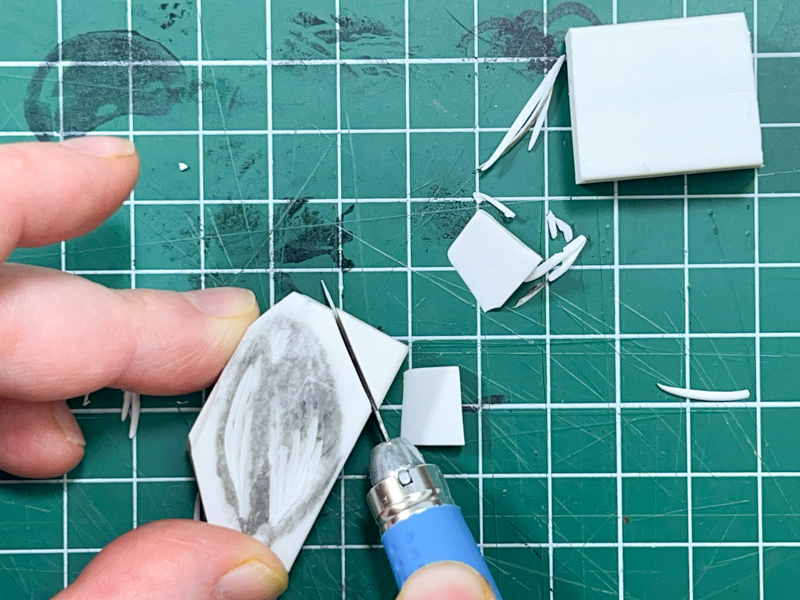
…cutting off extra rubber with your exacto knife…
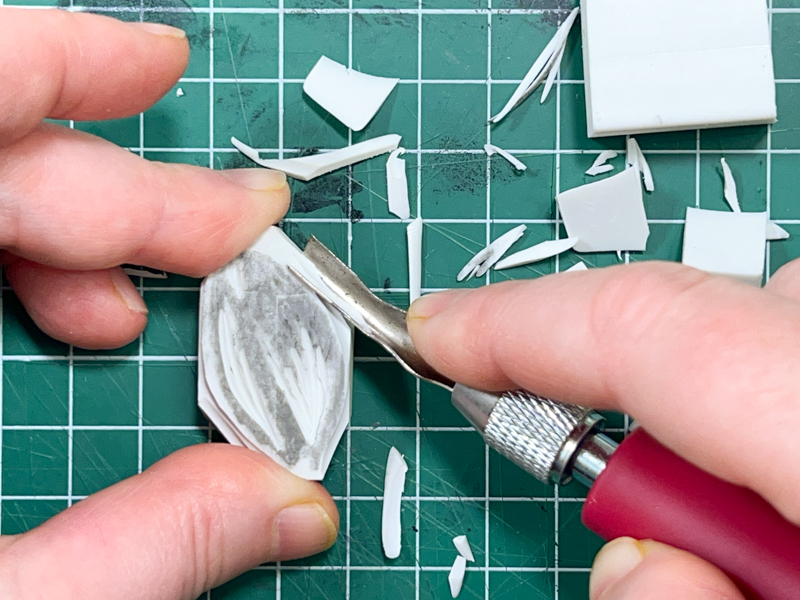
…then cutting the edges with a wide, U-shaped tool.
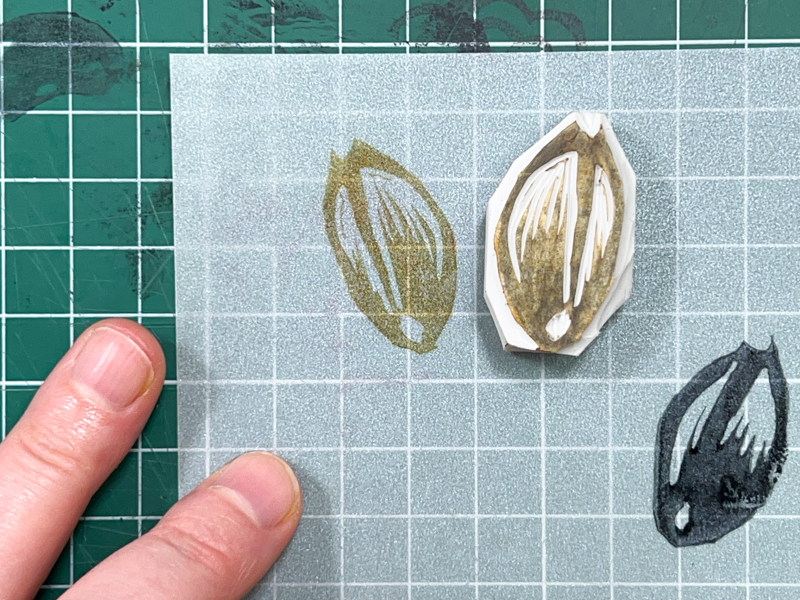
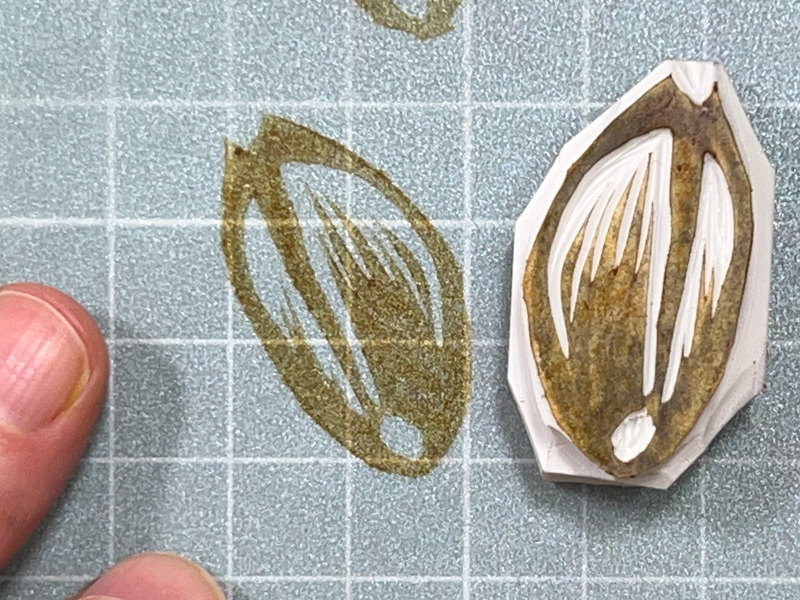
Check your stamp
Once you’ve carved your stamp, dab it on your ink pad and do a test print on waste paper. Do you have artifacts, which are raised bits of rubber catching ink, to remove?
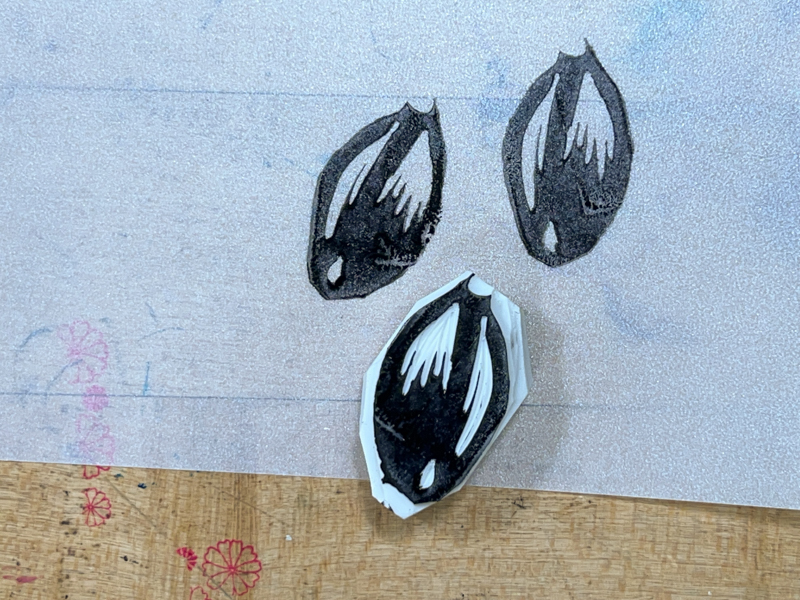
I found a flaw in my eraser—a line that was bothering me—and I wanted to fix the shape at the top, so I started over and made a second stamp on the back of the first.
I prefer this second shape. The lines are more slender, and I like the shape at the top of the pistachio shell.
Refine your stamp
Cut away artifacts and make any other desired changes.
Repeat the last two steps until you are happy.
If you ruin your stamp it doesn’t matter: just use everything you’ve learned to try again with a new eraser or on the back of the one you’ve carved. My cowrie design took several goes until I ended up with something I liked. Every try just got me more invested in the mission!
Enjoy your stamp
Congratulations on your first hand-carved rubber stamp!
Some ways to enjoy it:
Stamp onto pages torn from magazines; scraps of tissue paper, etc. Cut your stamps out and stick them in your journal.
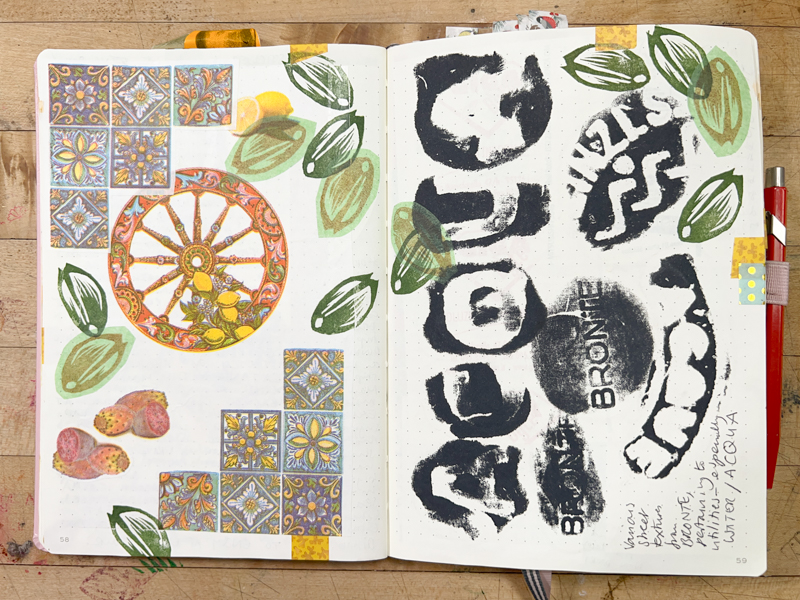
Stamp straight onto the page to mark special moments: I decorated the pages of my journal from the day we visited the pistachio farm with stamps straight onto the pages and also stamps on tissue paper.
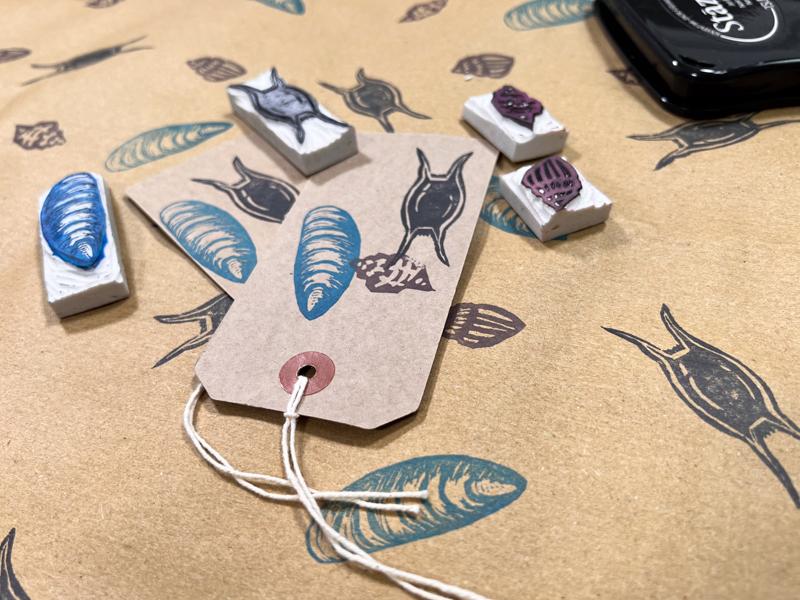
Make matching gift-wrap and tags.
Finally, revel in knowing your stamps could only come from you.
Know that this kind of inky mischief represents a form of resistance to perfectionism; a cherishing of our hands and the magic they can work; and an insistence that our human touch still really matters.
For a more in-depth look at this subject, subscribe to Felix’s Journal with Me membership, (here’s the link with an affiliate code for MDK) and check out the replay of the October 9th class “Put your stamp on it.”
This triggered such a memory for me! I did linoleum block carving when I was a teenager.
Wow, that is super cool! Thanks so much for sharing your expertise!
Me too! I loved carving lino as a teenager at school.
Same! In 7th Grade art class. With that special tool that scooped out the linoleum. I also remember making stamps with carved potatoes as a kid. Erasers is a great idea!
I really like how soft the erasers are to carve.
This is a great idea,! BUT, the pictures made me nervous. From personal experience, of my own and students, NEVER put your fingers in front of the blade when you are cutting it. Always hold the piece in back of the design. I have the scars on my fingers to prove it.
My first thought was injury, too. I have scars from eight grade art class! But it was so fun to craft lino pieces to print
I always use my fingers as a brake and I’ve never cut myself with the lino-cutter. The erasers are very soft, I carve extremely slowly, and my tools are not that sharp; I have a lot of problems with my hands and can get the lines I want working like this. I just took photos as I was working to try and show the steps I take.
In hindsight I should probably have posed the photos differently and included an important health and safety disclaimer, thank you for adding it here in the comments.
Love this!
This fills my heart with joy! I love making stamps (I like the white Pentel erasers, personally) and love to see the approach that others take to this intensely fun and addictive work. Can’t wait for your next journaling class!
ooh I have not yet tried the Pentel erasers, thank you for the recommendation – I am sure other folks will find that useful to know as well.
Do you have any suggestions for stamping onto cloth?
I stamped onto cloth in a workshop a couple of weeks ago at Tatter in Brooklyn. It was my first time ever doing this, and went really well.
We carved stamps like Felix is showing. Then, using rollers that printers use (can’t remember the name for these, but they look like rolling pins or paint rollers, but smaller), we applied water-based fabric ink to them and stamped them on our linen cloth as if we were stamping paper. I got a little neater about it with practice, but didn’t ever get as neat as some of my classmates!
Channeling a memory of carving linoleum blocks in Mr. Feldman’s 8th Grade art class, the roller thing for apply paint to the block was a BRAYER.
That sounds super! I’ve not yet tried using a brayer and stamping onto cloth but I imagine that the trick is all in getting just the right amount of ink on your stamp for a nice impression that isn’t too splodgy or too faint!
Excellent timing! My husband gifted me some of his old Lino tools last month and I have been carving stamps like a maniac. Very addictive. Working on holiday themed stamps this week for cards and gift tags. So cute.
It is addictive isn’t it? Once you make one, you have that idea in mind that “I could make a stamp of that” and it’s just too easy to start applying it to everything. So glad you’ve been enjoying it too! I bet all your cards and gift tags look really lovely with your special stamps on them 🙂
The rollers are called brayers!
So easy! I’m going to give this a try. I’ll experiment with stamping on fabric that I can embellish with embroidery. Who knows what will happen!
This looks like fun! “Let the hand be seen!”
Thanks for this guide. I bought most of the necessary supplies a number of years ago, but didn’t take the next step. Now I will take the plunge!
I was the same – I had the kit for ages and then when I finally cracked it out I was like WHY HAVE I WAITED SO LONG?!
I also bought the supplies (the Speedball kit) some years ago and haven’t gotten around to using it. Thanks to Felix’s instructions and encouragement, I think it’s time to try making a few stamps!
YES IT IS!!! It’s always stamp o’clock somewhere…
I love your stamps and have recently done block printing using a lino block. I also volunteer in an art room at an elementary school.
BUT please remind people to keep their fingers away from the blade! Your pictures show that if the craving tool kept going, if you pressed too hard on it, it would go right to your fingers.
I always use my fingers as a brake and I’ve never cut myself with the lino-cutter. The erasers are very soft, I carve extremely slowly, and my tools are not that sharp; I have a lot of problems with my hands and can get the lines I want working like this. I just took photos as I was working to try and show the steps I take.
In hindsight I should probably have posed the photos differently and included an important health and safety disclaimer, thank you for adding it here in the comments.
Carving tool!
Carving tool!
I knew what you meant!
I love this, your inspiring creativity in yet another way! You can also buy larger firms than erasers at art supply stores so you can make larger images. Try carving two or three that register (fit) together when stamped with different colors! And while you are thinking about getting all arty (a happy state of being), read the encouraging little book Steal Like An Artist by Austin Kleon. His thoughts are applicable to all kinds of creative endeavors and just fun to read.
Yes – I love the bigger sheets of carving rubber and have been making lots of bigger stamps with them, but for the sake of brevity and keeping this as just an introduction to the topic I left them out – but I love these advanced technique possibilities and thanks for sharing them and your book recommendation.
It was a good introduction to this fun art craft. Stamping aka printing is very forgiving and satisfying, and anybody can do it. Thanks for your thoughtful post encouraging us all.
These are beautiful, well done!
thank you so much 🙂
My third grade teacher was an artist and taught us this technique using wood(!) and black ink. The resulting prints were beautiful and began a lifelong interest in this type of art. When my nieces and nephew were small, I taught them, but used lino. The stamps make excellent Christmas gift tags.
Memories of my lovely Flex Cut tools and a printmaking class in Atlanta. What stands out is that there was a package of bandaids included in the box! Printmaking is sooo satisfying. Thanks for the nudge!
One more tip. After transfering the design onto the eraser, I use a permanent marker to go over the transfer lines. That way, I don’t have to worry about smudging the design as I carve.
It looks rather perilous – A blade as sharp as a lino cutter aiming straight to some fingers!! . A block to wedge over the edge of the table with a raised corner to hold the lino (NOT fingers!!) is needed to keep fingers and blade well apart!!
Best wishes, Janet
Hi Janet, if you are worried about the cutting tools you can get a hand safety guard from Essdee. You push your block into the corner of the guard and it stands between your hand and the blade! https://www.craftyarts.co.uk/essdee-lino-carving-hand-safety-guard