Techniques
New Beginnings and Endings for Ladderback Jacquard
I love that so many of you have joined me on the ladderback jacquard bandwagon (or LBJ, to the cool kids—that’s Kay and Ann, of course). LBJ is my favorite solution for working long floats in stranded colorwork, and it seems it’s a favorite of a lot of you, too, as you’ve shared in your enthusiastic responses to my tutorial article and online class.
But like any knitting technique, the deeper you dive, the more you learn. And I like to do deep dives into knitting techniques. Of course there is more to LBJ than I was able to share in a single tutorial, so I’m back to talk about alternative ways to start and end your ladders.
Why and When?
Why would you want to start or end with a different technique? To begin with, let’s look at the starting point of our ladders. My favorite technique and the one I think is easiest is the simple e-wrap cast-on I wrote about before.
It’s elegant and completely invisible because it’s unconnected to the back of the fabric. But because it’s unconnected to the fabric it does offer a place where fingers or toes could catch. So if I’m knitting mittens, or socks, or garments for little ones, I prefer to work a ladder that’s connected at both ends.
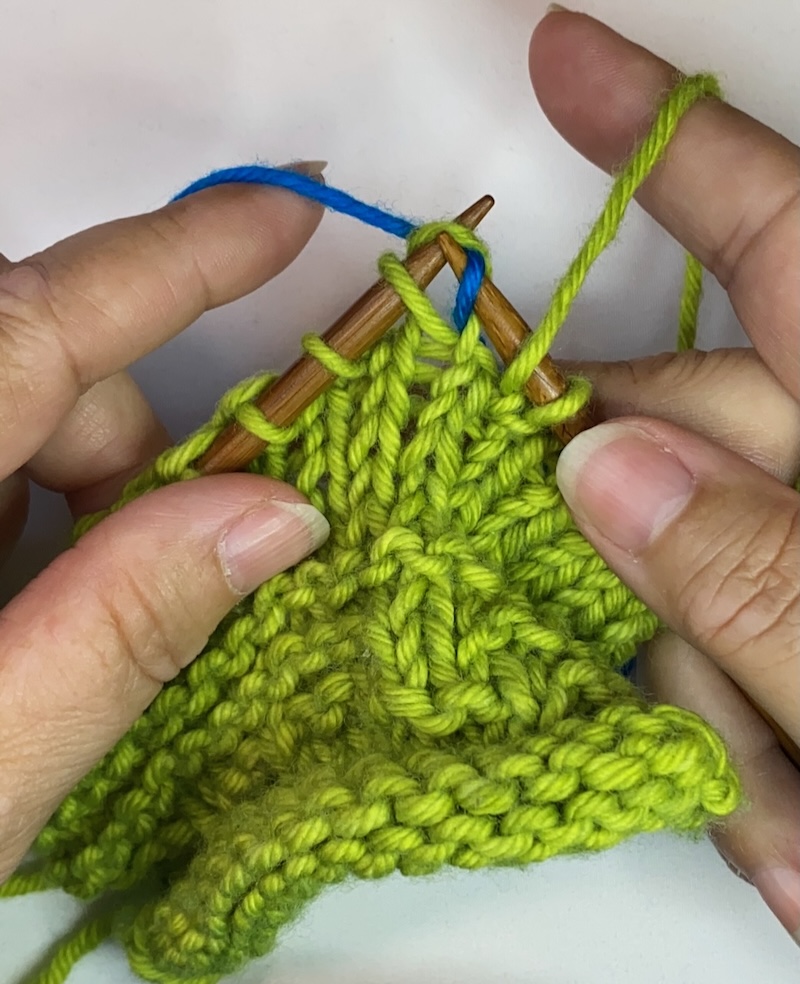
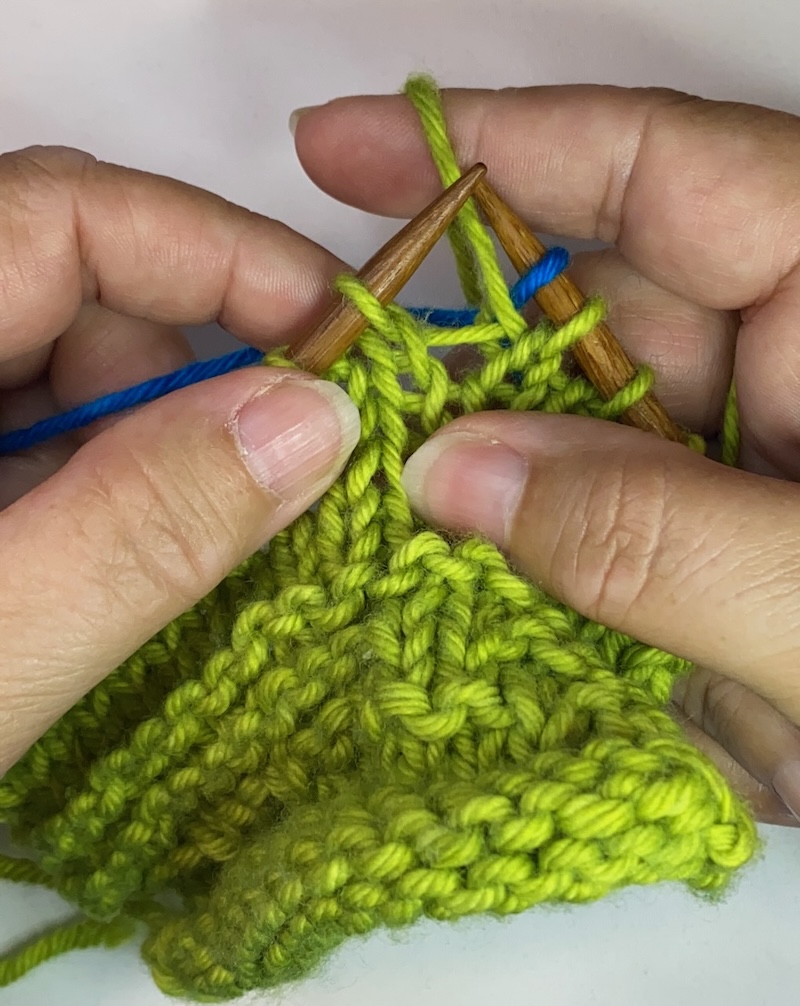
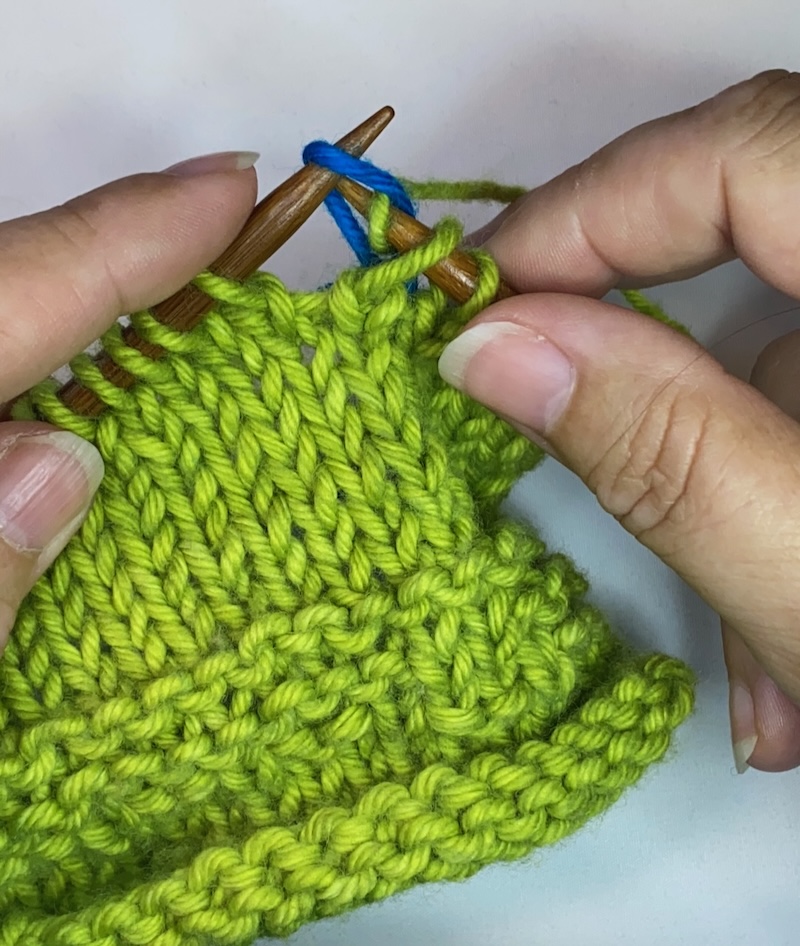
To do this, you’ll need to start your ladder with an increase that’s connected to the fabric. One way to do this is with a right-lifted increase. When you reach the place you want your first ladder to be:
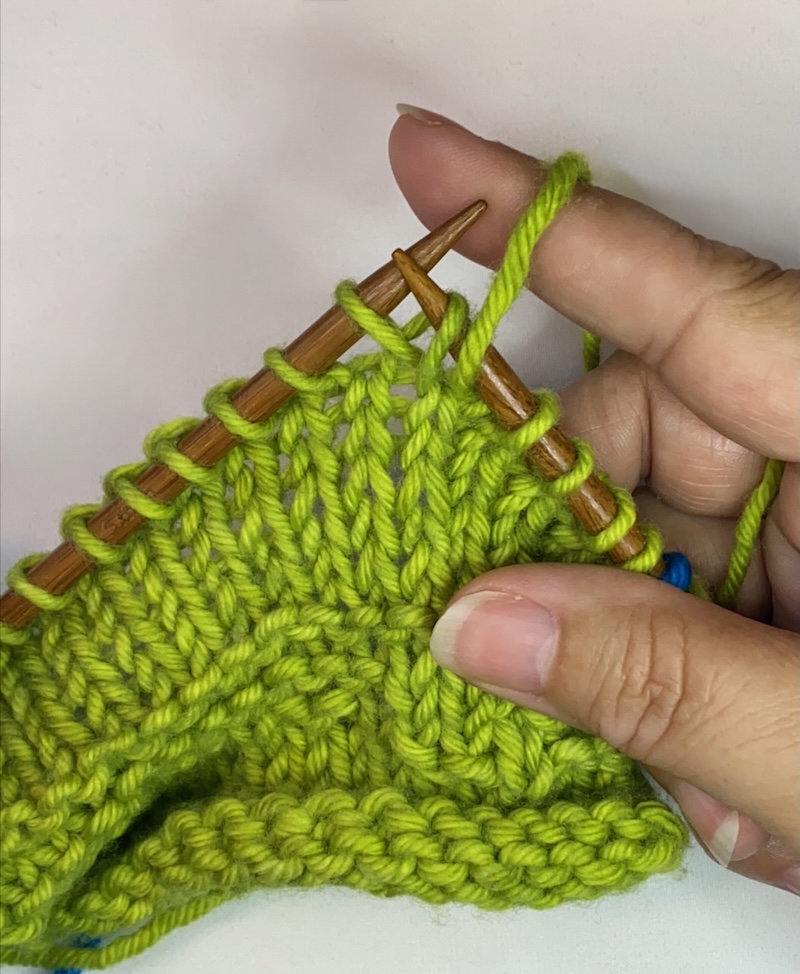
Begin by moving your main color yarn between the needle tips to the front of the work. Then with your right needle, pick up the right leg of the stitch below the next stitch on the needle from back to front.
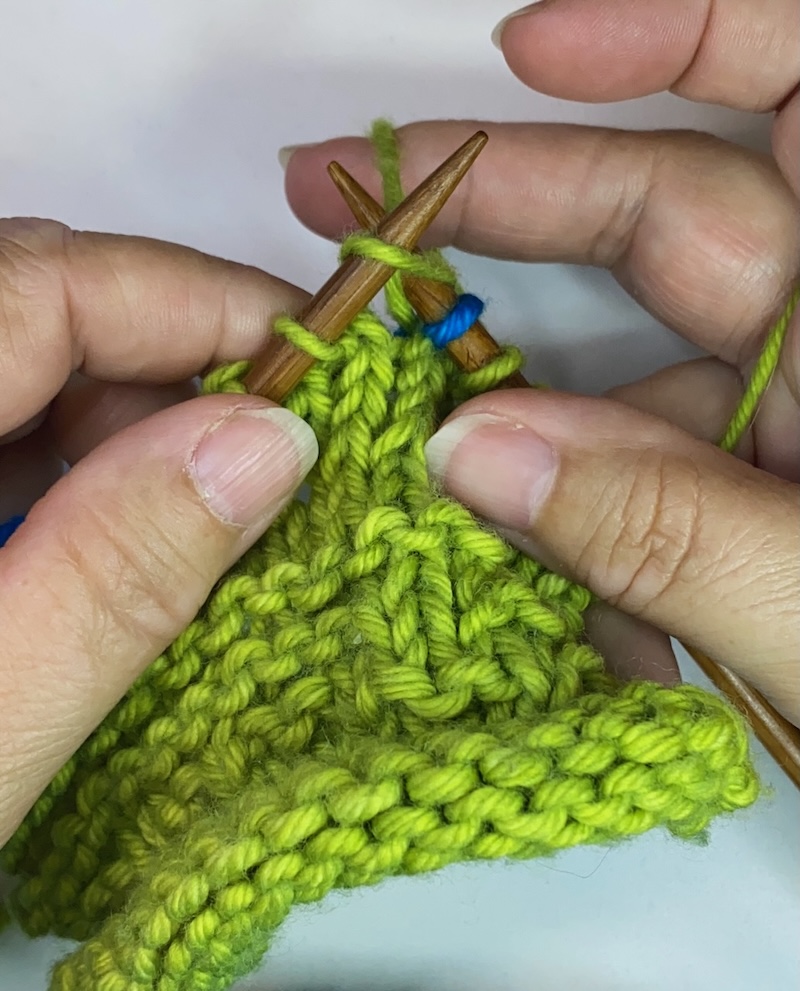
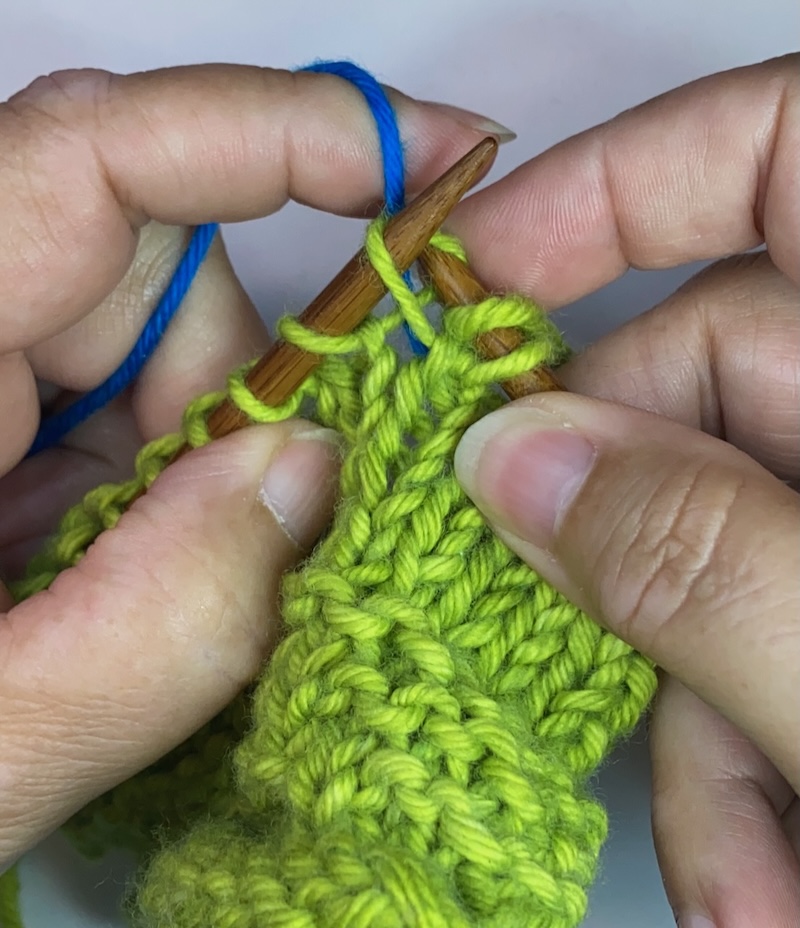
Lift that leg of the stitch onto the left needle…
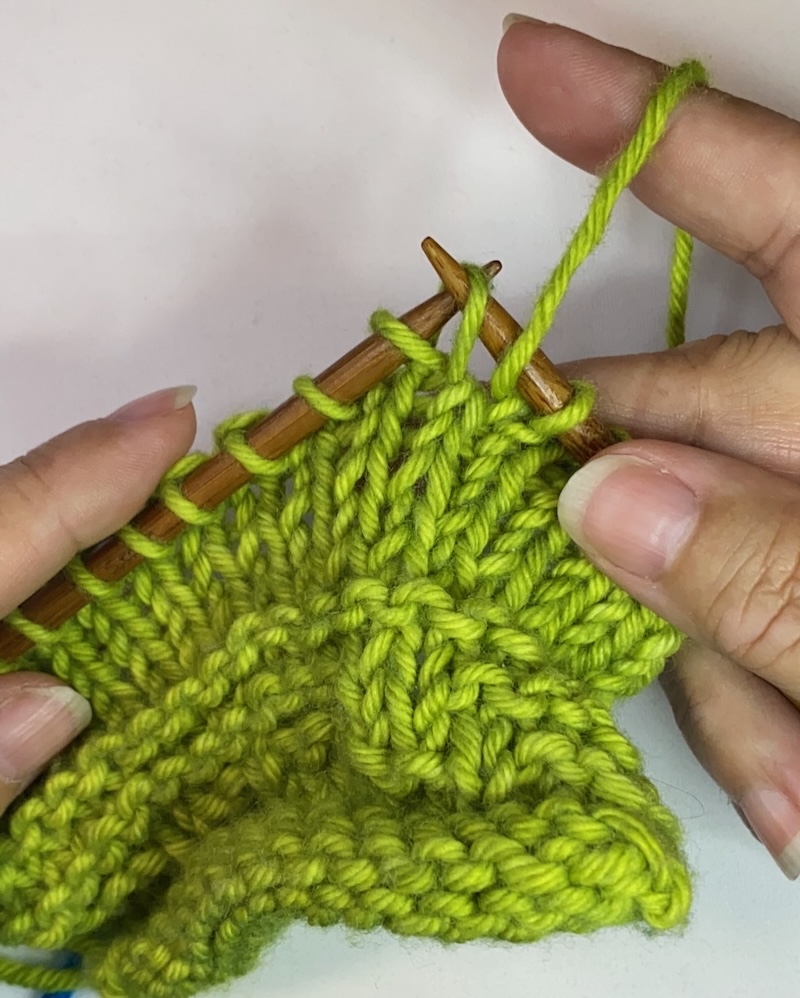
…and knit into it with the contrast color. Remove just that new stitch from the left needle, leaving the original stitch there.
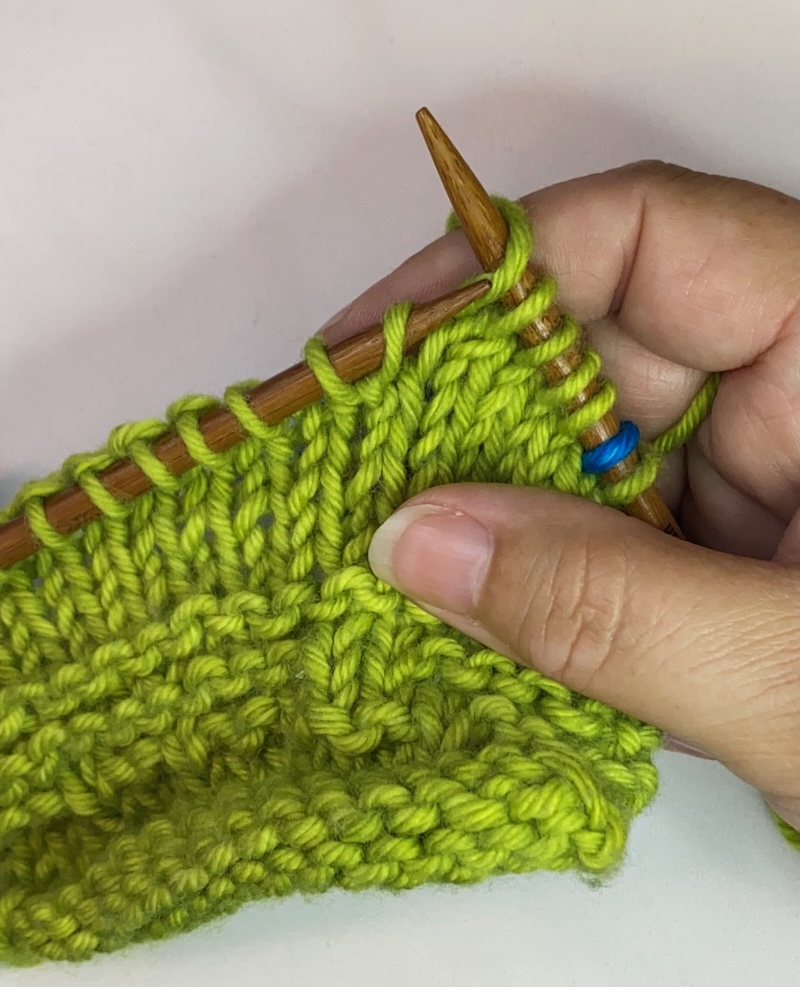
Move the main color between the needles to the back of the work, then knit the original stitch remaining on the left needle with the main color yarn.
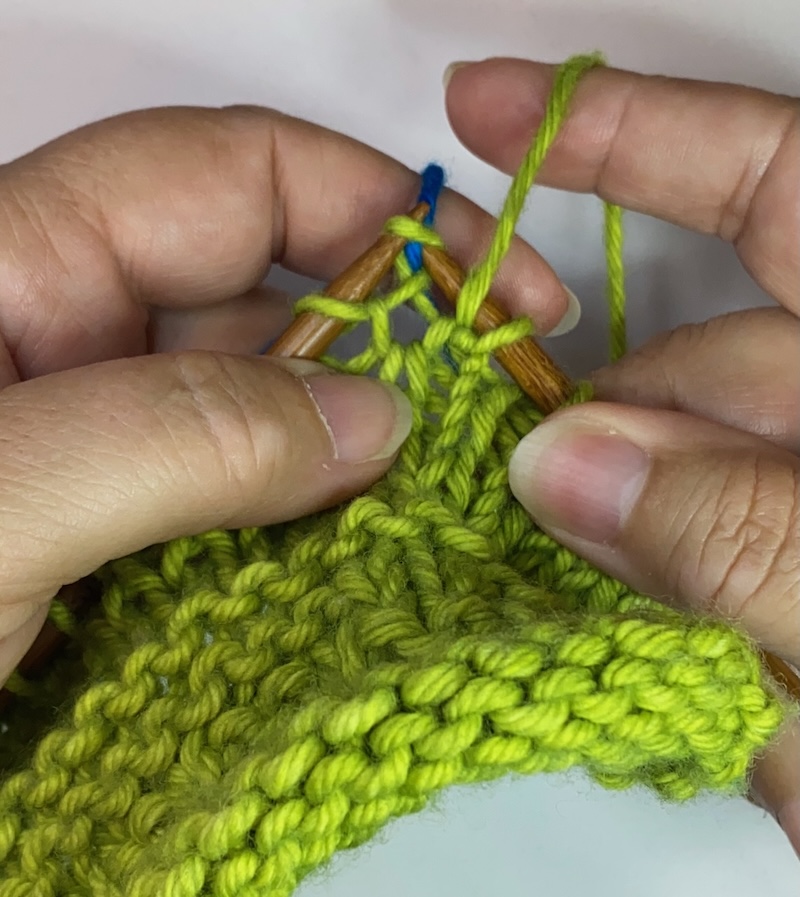
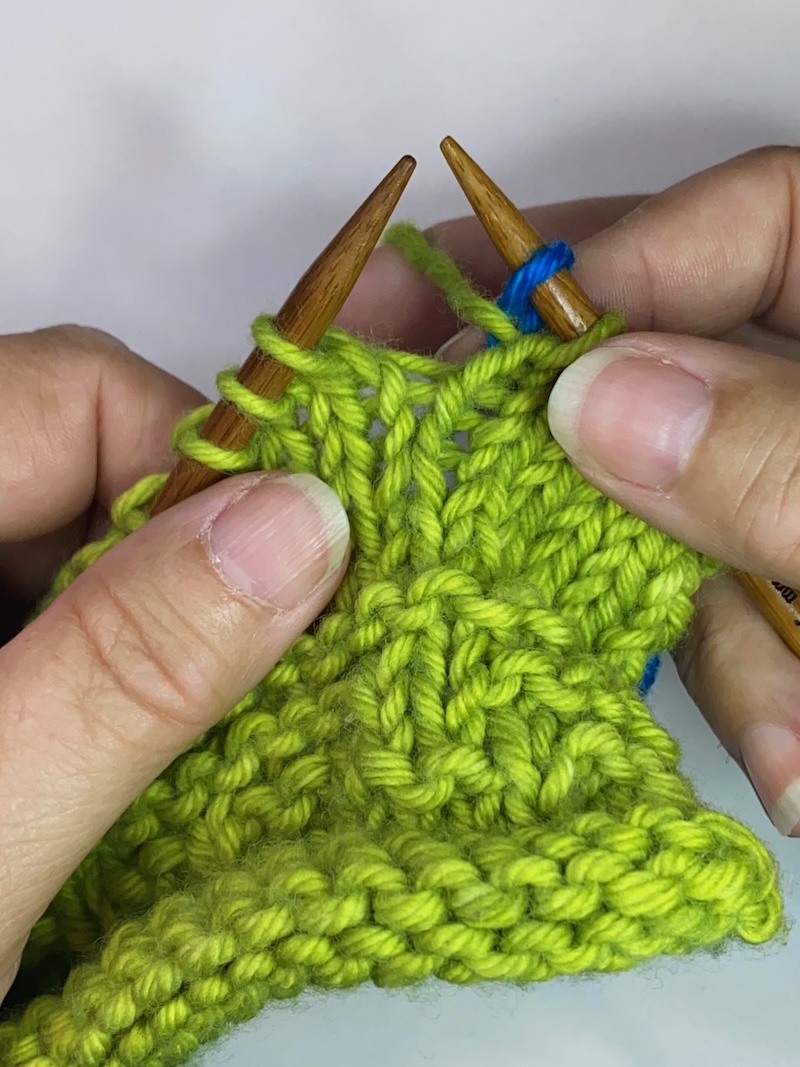
Alternatively, you can start your ladders with a make one right (m1r) or make one left (m1l) increase. For a m1r:
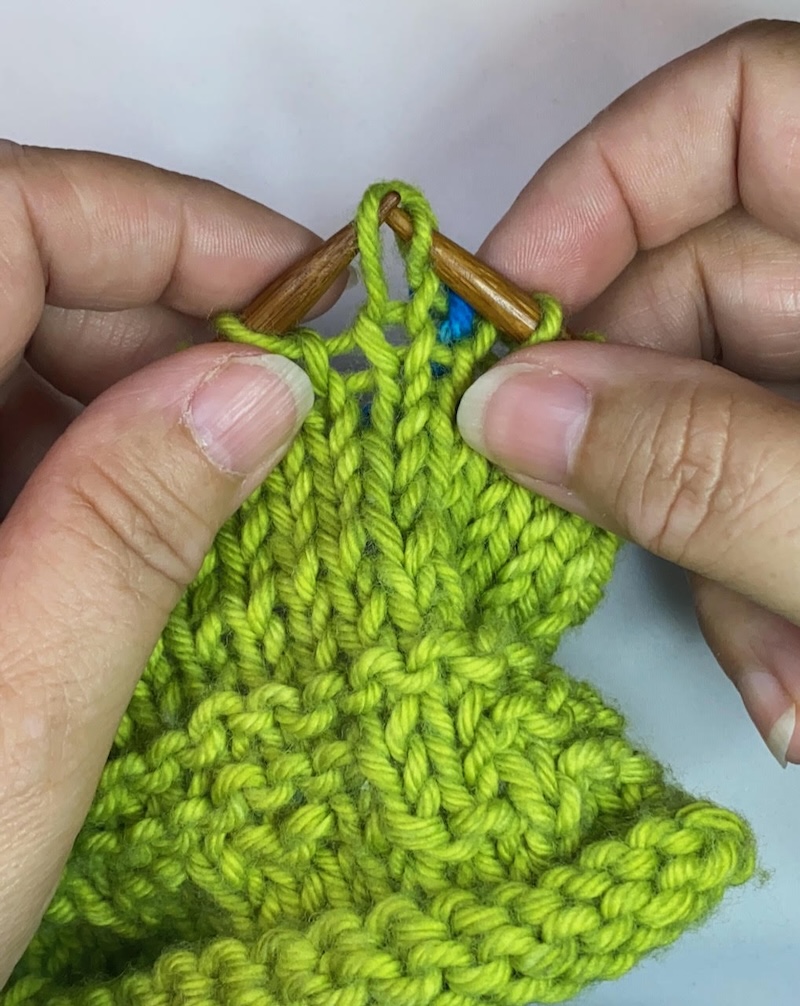
Begin by moving your main color yarn between the needle tips to the front of the work. Then with your left needle, pick up the running thread below from back to front.
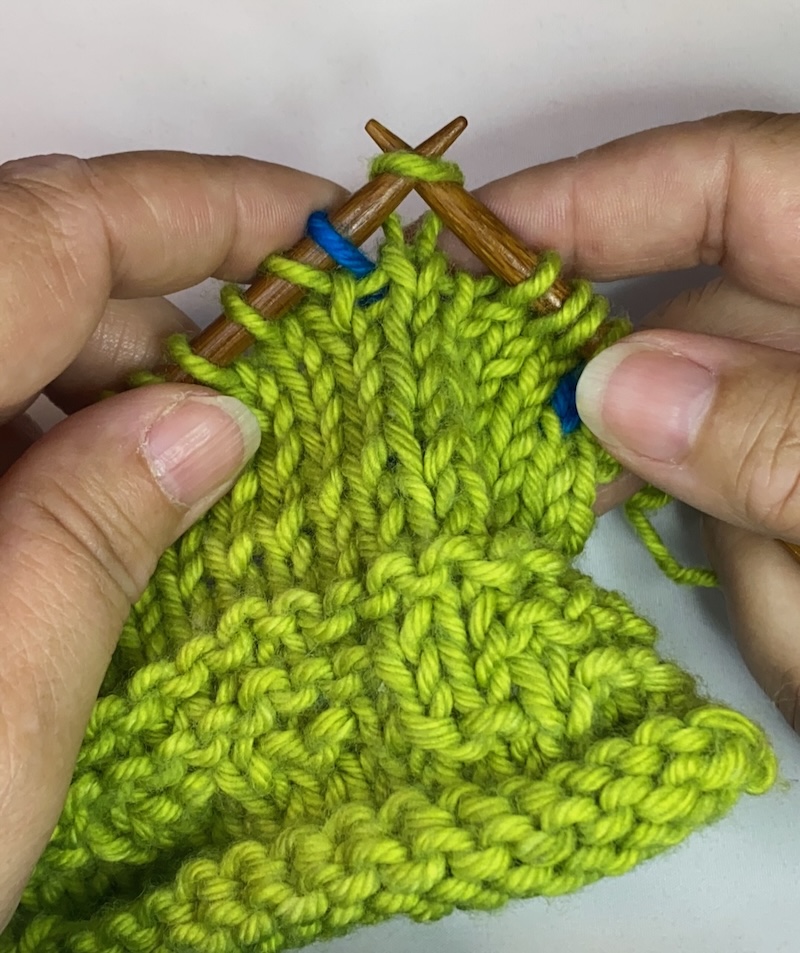
With the contrast color, knit into the loop you have picked up so as to twist it by inserting the right needle into the front leg of the picked-up thread.
Move the main color between the needles to the back of the work where it’s ready to knit the next stitch.
For a m1l:

Begin by moving your main color yarn between the needle tips to the front of the work. Then with your left needle, pick up the running thread below from front to back.
With the contrast color, knit into the loop you have picked up so as to twist it by inserting the right needle into the back leg of the picked-up thread.
Move the main color between the needles to the back of the work where it’s ready to knit the next stitch.
Any of the above increases can be substituted for the others and while none is as invisible as the e-wrap, it’s good to have options.
Alternative Endings
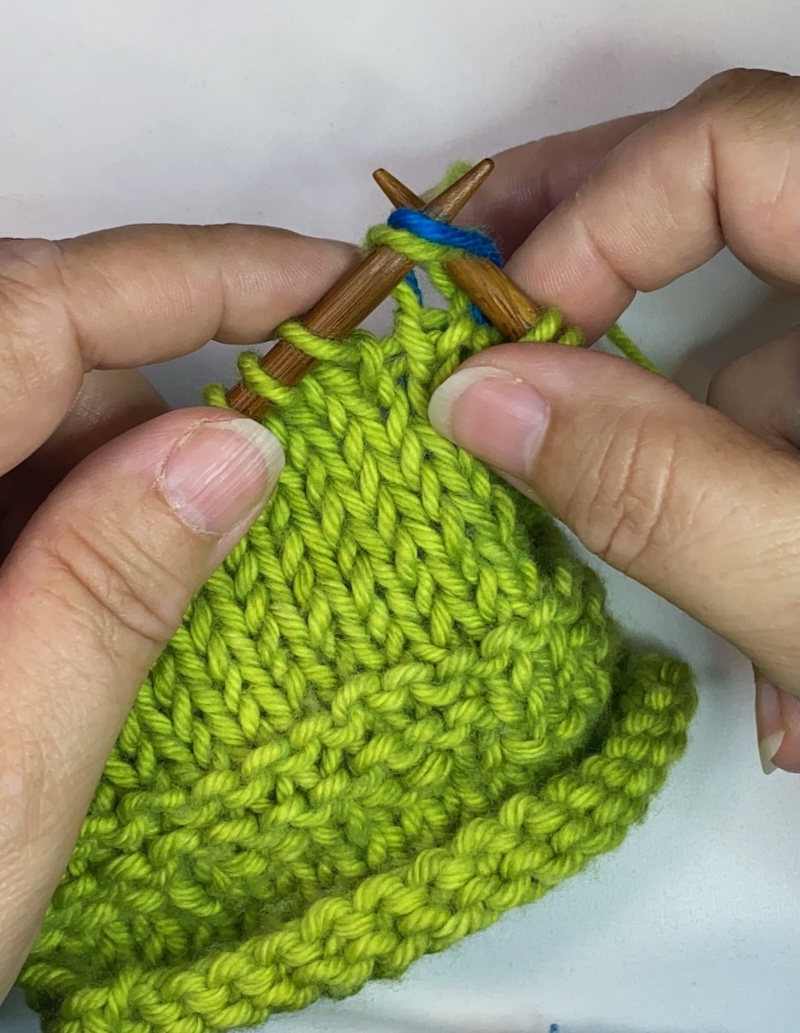
Similarly, we can use alternative decreases to end our ladders. Although the SSK I showed you in the earlier tutorial works beautifully, some of us find that a PSSO looks even better. To work the PSSO, knit until one main color stitch remains before the ladder stitch you want to eliminate, then:
Slip the first stitch as if to knit.
Knit the second stitch (the ladder stitch) with the main color.
Pass the slipped stitch over the knit stitch. You can pull the contrast color stitch away from the back of the work a bit to help hide it completely.
Or, we may prefer the simplicity of a k2tog to end our ladders:
When working a k2tog, knit all the way to the ladder stitch you want to eliminate, then:
Work a k2tog using the ladder stitch and the stitch to its left. You can pull the contrast color stitch away from the back of the work to help hide it better.
Next time you’re working an LBJ, why not try a new way to start or end your ladders? You may just find a new favorite.
Thank you for your article! This is a technique that I’ve been trying to learn.Unfortunately, your link to your online class is not working. I’m presuming that it happened already? I’m hoping that it was recorded so I may “sign up” for it when my brain is ready to absorb this new technique as this is still a bit mind boggling to me …
The class was recorded and is indeed still available!
Where does one sign up for this recorded class?
Great to keep this fresh in the mind! Thanks.
Oh, this is useful! Thank you, Amy! LBJ has been a great technique to use with Doodles, and it’s lovely to have more tools to make it a better technique!
I was worried about the unconnected fabric getting caught – hooking the ladders to the main work is a great tip.
I know there are different definitions of m1r and m1L – I learned m1r as your first example above, without the twisting of the stitch. The first picture of how to pick up the loop for m1r is difficult to see what you are doing.
I knit the last row of the jacquard in the MC so that my k2tog or psso is further disguised.