How To
Techniques in Depth: How to Attach Buttons
Ok, you’ve got holes for buttons. Let’s talk about the buttons themselves.
Specifically, I want to talk about how to attach the buttons to your knit fabric. This is given startlingly short shrift in patterns: “attach buttons” is usually about as detailed as it gets.
The short answer is: you sew them on. How you do that depends on a few factors, starting with the choice of buttons.
What You Are Attaching

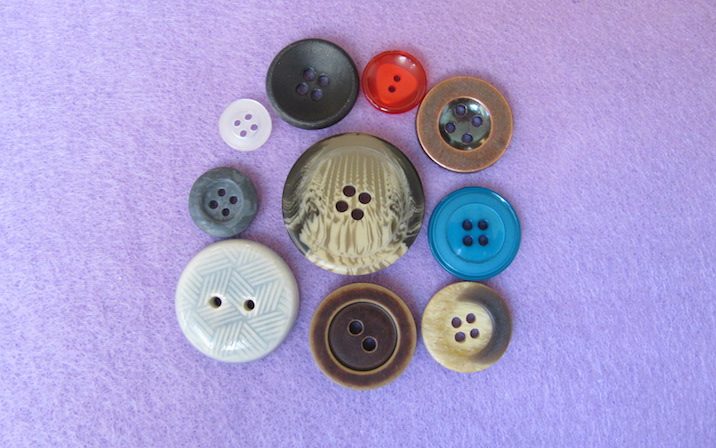
Plastic, horn (real or faux) and standard (i.e., purpose-made, properly finished) wood buttons are readily available and popular. They’re nice and light, and ideal for garments that are going to be machine washed.
Metal and ceramic buttons tend to be heavier and often fragile, and are therefore better suited to garments that are going to be hand washed.
Of course, there are a million types of specialty buttons: antique horn, bits of wood with the bark still attached, leather-covered ones (faux or real).
The Two Ws
No matter what they’re made of, when attaching buttons you need to consider their weight and washability.
If you’re making a sweater that you know will be machine washed (and even dried!) and want the absolutely easiest care, go for plastic buttons. (And although this is probably obvious, it’s worth saying anyway: I’m talking about modern plastic buttons that are designed for clothing, not very old vintage buttons or random pieces of plastic. You don’t know how something will respond to water and heat.)
Many ceramic and metal buttons purport to be machine washable, but as with most things, a gentler touch is better. I will use these for knits I intend to handwash. Even if they do OK with water and heat, there’s always the risk of breaking them.
Some books provide the purportedly helpful advice that if you’re using non-machine washable buttons on a machine-washable garment, remove the buttons for washing, and replace them once the garment is dry. This goes in the category of “Life Is Too Short,” if you ask me; I’m personally hard pressed to sew buttons on the first time, let alone multiple times throughout the life of a garment.
If you’re handwashing a garment, and you’re nervous about getting the buttons wet—I’m never sure about fabric or wooden buttons, personally—wrap them in aluminum foil before the wash.
If the button is very heavy–solid metal or ceramic, for example—it can cause the fabric to sag. Use a backing button: choose one smaller in circumference and as flat as possible (see photo for an example), and attach that to the back of the fabric, as a counterbalance. (More on how to do this below.)

A blue button and its smaller backing button.
For buttons that are medium heavy, or not too heavy but particularly large, a piece of thick fabric can be used as a backing. A little circle of polar fleece or felt is ideal for this, as it doesn’t need any finishing, and if in a complementary color, isn’t unattractive.

For a really lovely finish, line the entire buttonband with a ribbon before you sew the buttons on.

I’ve worked little whipstitches along both edges of the ribbon, about an eighth of an inch apart. It doesn’t look very tidy – because honestly, it’s hard and stupidly time consuming to make it tidy! Since this will be worked in thread that matches your ribbon, and it’s on the inside of your work, the beauty of the stitching isn’t important.
The advantage of using fabric or ribbon on the other side is that it not only balances the weight, but also stabilizes where it’s attached, to minimize sagging and stretching.

Another variable is whether the buttons have a shank—a little stand or extension that causes the button to sit away from the fabric rather than flush with it. A shank button is an excellent choice for a particularly thick fabric, but you can also make a thread shank for a standard button, as outlined below.
In the MDK Shop
What You Are Attaching To
A very thick knit fabric—that is, made with a bulky-weight or heavier yarn—needs a button with a built-in shank or thread shank. The shank lets the button sit a little away from the fabric, creating space for the edges of the buttonhole to sit under the button, without squishing.

Top button (plastic): no shank. Bottom button (metal): shank.
In this photo, you can see how the buttonhole band is distorted under the plastic button. There isn’t enough room for it to tuck neatly under the button.
A very open, loosely knit fabric will need a backing—button or fabric—to ensure stability.
What to Attach With
Yarn or thread—what to use to attach your buttons? There is no single answer, and as with so many things, this is a topic that engenders great debate. Use the solution that works for you and for your project.
If your yarn is smooth and strong (i.e., tightly twisted, more than one ply), and it fits through the holes in the button along with the needle you’re using, you can certainly use it to sew on the buttons. I wouldn’t use a fine or fragile yarn; you’re just asking for it to break and the buttons to fall off. And a textured yarn makes for unpleasant sewing.
The challenge with using yarn is that it’s relatively bulky, and the holes in the buttons will get full, before the button is sufficiently secured. I choose yarn if the button and the holes in the button are relatively big, and the yarn itself is strong and fine. Another downside to using yarn is that it can add bulk on the wrong side of your work and gives you additional yarn ends to weave in. To reduce the bulk, some recommend splitting the plies of the yarn, but then you risk weakening it. (Also it’s a bit of a hassle.) Others recommend using crochet cotton instead of yarn. If you’ve got some lying around, you can use it, but I wouldn’t seek it out specifically.
For most applications, I prefer to use standard sewing thread. This allows me to use a standard hand-sewing needle, which eliminates any worry about whether it will fit through holes in the buttons. The usual polyester or cotton-wrapped polyester thread that I use in my sewing machine is perfect. (A pure cotton or silk thread isn’t going to be quite as strong.)

Regular thread on the left; button and craft thread on the right.
If the button is particularly heavy, then a heavier thread, labeled “button and craft” or “button and carpet,” is helpful, but not absolutely required. You can always just use more of the standard thread for extra security.
How to Attach Buttons
To mark where you want the button placed, use safety pins or removable markers to align the bands and hold them together, and clip another removable marker where you want the buttons placed.

Thread the thread onto the needle, letting the needle sit in the middle of the length, for double thickness—which adds extra strength and reduces the sewing.

Make a knot at the end. (I just make an overhand knot, essentially a slip knot that’s been pulled out.) The knot itself won’t stop the thread pulling through the knit fabric, but you can use the knot to catch the thread (on the wrong side) to keep it in place when you start sewing.

Catching the knot.
Use this technique to solve two problems at once: secure the thread, and mark where you want the button placed. If I’m using a backing fabric or button, I will work through the knit fabric and backing fabric/button once, to keep it in place, before I add the outer button.
Then hold the button on the right side of the fabric at the appropriate place (don’t laugh, this is easily messed up), and start sewing, up and down through the knit fabric and the buttonholes. If you’re using a backing fabric/ribbon, or a backing button, you’ll being work through three layers: the button, the knit fabric and the backing fabric/button.
Don’t be tempted to sew the two on separately—it’s not as good for strength or balance. The value comes in having the front and back pieces joined together, with the knit fabric sandwiched between them.

The sandwich.
If using thread, you don’t need to be particularly precise about where the needle goes—work into the yarn or the stitches. If you’re sewing with yarn, then you’ll want to work around the fabric’s stitches, weaving the yarn around itself.
Making a Thread Shank
If your button doesn’t have a shank and you need a bit of distance between the button and the fabric, create a small thread shank. I like to use a wooden match for this, but a barrette (hair grip), toothpick, or even a spare yarn/darning needle, would work just as well.
Place the match under the button, positioned between the holes. Sew the button on, leaving the match in place.

When you’ve been through enough times—make sure the button’s holes are nice and full—remove the match.
Pull the button up, away from the fabric, and bring the needle from the back of the fabric so it’s under the button. Wrap around the threads under the button a few times, enough to create that little stand to keep the button a little distance away from the fabric.

To secure the thread and the shank, push the needle down through the shank to the back of the fabric, and back up and through, a couple of times.
If you sew with thread, I like to cut the ends quite long and then knot them around each other. I will run the needle under the little clump of stitches on the wrong side, to create a loop of yarn, put the needle through that loop and pull it tight—and maybe even do it a second time. I will then work a double overhand knot with the two ends of the thread, knotting as close as I can to the base.
If you sew with yarn, cut the yarn, leaving decent long tail(s): at least 4-6 inches. If you used doubled yarn, separate the two ends, tie a double overhand knot with both ends, then weave the two ends in separately. (If this isn’t the deciding argument for sewing with thread, nothing will convince you.)
If you use a single thickness of yarn, tie it around itself a few times (as with the thread) and then weave in the end.
Ultimately, shank or no, yarn or thread, what you’re aiming for here is a secure enough attachment that you never have to do this again.
Or just use a shawl pin. Just because a garment has buttonholes doesn’t mean it needs buttons.
PHOTOGRAPHS © KATE ATHERLEY
Very good, instructive article. Having figured all this out the hard way, in bits and pieces over decades, it’s good to have the knowledge gathered together.
That said, I have just discovered the magic of a button band in ribbon to stabilize a sweater edge. Even a chiffon ribbon works magic to suddenly make that edge clean and straight and finished-looking.
This is very helpful! I’m a seamstress as well as a knitter and I have always struggled with button-attachment! Thank you!
It was “kismet” that this appeared in my email this morning. I am exactly at this point in the finishing of a sweater and was obsessing about how to do it “the right way!”
Kate’s explanations and, more importantly, her photos are so thorough. I will proceed with confidence. Now, to find a bit of ribbon that matches the sweater…
Another excellent article! My mind was blown as soon as I read – wrap the buttons in aluminum foil.
Wow, this article was both more helpful and more interesting than I would have thought given the topic. A testament to great writing!
Excellent tutorial! The only addition that I would make is to use thread labeled ‘Hand quilting thread’. It’s very smooth, strong and not as heavy/bulky as the craft/carpet thread, easier to use. Personally, I love sewing on the buttons–it means finished!
The photo of ribbon sewn to the back showed a fraying cut edge at the bottom. I’m sure you wanted to fold under a quarter inch and stitch that down, right?
Why would you ever leave a sloppily sewn on ribbon band backing and think it was okay? My Mom was a professional seamstress (she made wedding gowns among other things), and she always said, “Do it correctly.” I redid so many things when I was younger under her tutorage to get it right. If you have knit a masterpiece of a sweater, why would you ever settle for less when finishing it?
Kate notes above that the stitching “will be worked in thread that matches your ribbon, and [as] it’s on the inside of your work, the beauty of the stitching isn’t important.” I don’t enjoy sewing and am not very good at it, so I found her advice comforting.
When doing a knit-as-you-go band like the sample in your illustrations, you can work a “wrong” stitch, or better, a wrap or two, on the button side to save time later. That’s if you work both fronts at once, of course.
WOW! Just in time. I’m ready to attach buttons for Mint Julep cardigan, by Baby Cocktails. I can’t believe the timing……knitting karma.
Excellent article! For those special buttons that you really want to use but now sure how they will stand up or for a baby sweater not knowing the sex — I make matching sets of buttonholes. The buttons are then sewn on a strip of ribbon or put in a crochet chain. Means the buttons can be easily removed for washing or stitched more permanently when you decide which side they are needed on.
What a great idea!
I had to read that twice to form the right mental picture. Very interesting technique and one that I will try. Thank you!
OMG!!! Every time MDK publishes an article about something that I think I know how to do (and have been doing for 20 years) I learn that I’ve been doing it incorrectly this whole time! Thank you!
Great instructions! I don’t like dealing with the thread knot. I use the no knot method – take a double-length of thread, fold it in half, put the two ends through the eye of the needle. You can take your first stitch through the loop at the end of your thread.
Judy, it’s only no knot at the beginning. There’s still a knot to be made at the end of the button sewing, sadly. But at least it saves you 50% of knotdom.
This is genius, especially for handknits where the ends of the threads would otherwise always poke out.
One of those nice tips from the embroidery/cross stitch world.
Chelle, can you explain this more fully? I get that you can take your first stitch through the loop, but what happens when you’re done sewing the button? Don’t you still have ends? I’m not getting this.
Thank you for the excellent tutorial. Your contributions to MDK are always among my favorites. Now I just need to finish my cardigan.
This is so helpful, particularly for someone like me, whose sewing skills are rudimentary at best! Definitely a clip ‘n’ save article! Thank you!
Great, easy to follow article!
I have needed this article for a long, long time!!
What great timing for me — I have been putting off sewing a mere 3 buttons on my Tea Leaves Cardigan in worsted yarn. I will make a shank since I bought flat buttons — thanks for the tutorial! I learned more than one thing in this article — it’s getting bookmarked!
Please publish this in pamphlet or book form! This is an amazing article that I am going to re-read a few times! Great reference material and ideas!
Thanks so much! This is so helpful.
Don’t forget corozo – it’s made from palm tree seeds and can be machine washed.
Unless I’ve knitted mittens that need to be felted, I would not wash my hand knit in the washer. Hand knit. Hand wash.
What a great article!! So helpful, thanks for sharing.
Very interesting information and detailed in many different ways. All new to me.
Just what I needed, thank you.
ƅookmarked!!, I love your web site!