How To
Techniques in Depth: Basic Sleeve Alterations
My two previous columns were all about how to handle a fairly common number puzzle in knitting patterns: what to do when the pattern asks you to increase or decrease stitches “evenly” across a row or round—even when the number of stitches isn’t even!
When you’re confident solving that puzzle, you’ve got the skills you need to actually start altering garment patterns. Yes, really!
The simple division that I showed you in the previous columns is that powerful.
Don’t sweat the row gauge
Row gauge is one factor that comes up a lot in discussions about knitting patterns and how to alter them. For lots of reasons, it can be weirdly hard to match row gauge, even when you’re matching stitch gauge perfectly.
Now, if you’re off by a LOT–like 5 or more rows/rounds in 4 inches (10 cm)–then this might be a clue that the yarn isn’t a great choice for your pattern. But being somewhat off on row gauge is not uncommon, especially when knitting garments. That’s ok, it’s really easy to make adjustments for your row gauge.
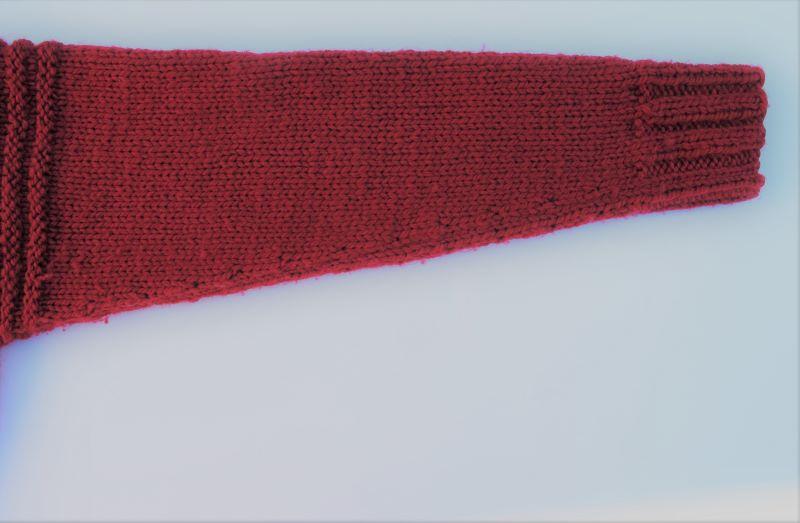
Let’s take the classic example of the shaping a sleeve between cuff and underarm. If working bottom up, once you’ve worked your cuff, the instruction might look something like this:
“Increase every 10 rows, 12 times. Once increases are complete, work even until sleeve measures 18 inches from cast-on.”
If working top down, the instruction will be similar:
“Decrease every 10 rows 12 times, then work even until sleeve measures 16 inches from underarm.”
Writing these instructions, the designer has assumed that your row gauge matches theirs. But if you’re working fewer rows per inch, the distance covered by the shaping will be longer than the designer intended; if you’re working more rows per inch, the sleeve will come out short.
By applying the skills in my last two columns, it’s really easy to adjust the pattern to suit your row gauge.
Do use the schematics

On a sleeve, increases/decreases are only worked in the length between the top of the cuff and the underarm. For a top-down sweater, the instructions will specify the length–it’s how long you work before you start the cuff. For a bottom-up sweater, it’s the full length of the sleeve less the cuff. You might have to do a quick subtraction.
Then work out how many rows or rounds are in that length given your row gauge.
If it’s 16 inches, at 6 rows per inch, that’s 16 x 6 = 96 rows.
Let’s say the pattern instructs you to work an increase or decrease 12 times.
All you’ve got to do is distribute 12 increase/decrease rows evenly through 96. YOU CAN DO IT!
96 rows ÷ 12 increases/decreases = 8
Think: 12 repeats of an 8-row pattern.
You could distribute the increases/decreases like this:
(Shaping row, 7 plain rows) 12 times
But working it like this is a bit more centered:
(4 plain rows, shaping row, 3 plain rows) 12 times
Which, rewritten for ease of keeping track, looks like this:
4 plain rows, (shaping row, 7 plain rows) 11 times, shaping row, 3 plain rows.
Perfect!
Not even, no problem
And if the division doesn’t work entirely evenly, you know what to do.
For example, if your gauge is 7 rows per inch, 16 inches is 112 rows.
112 ÷ 12 = 9.333333… which means that 112 = 12 x 9 + a remainder of 4
If we use the rules from the previous columns, this gives us:
(Shaping row, 8 plain rows) 12 times, 4 plain rows.
This needs a bit of tweaking to address two issues. First: it’s not very well distributed–there’s a full 12 plain rows at the end after the last shaping row. Second: it’s a little bit tricky to work.
You’ll likely have noticed that these types of instructions in patterns most always magically have even numbers of rows, e.g. increase every 10th row, or decrease every 4th row. That’s because it’s just easier to work increases and decreases on RS rows … so take that into account when you work things out.
In this case, what I’d do is change the shaping pattern to be worked over an even number of rows by reducing the plain rows by 1. That means that I’ve got 12 spare rows, which I can put at the start, like this:
12 plain rows, (shaping row, 7 plain rows) 12 times, 4 plain rows.
I like that!
Pepper it up
If you wanted to get clever, you could also take some of those extra plain rows from the beginning and end, and pepper them through the repeats. In this case you always want to move around pairs of rows, so that you’re keeping those increases on the RS. So instead of working 12 repeats of (shaping row, 7 plain rows), turn some of them into (shaping row, 9 plain rows).
If I reduce the number of plain rows at both beginning and end, I can do something like this:
8 plain rows, (shaping row, 7 plain rows) 8 times, (shaping row, 9 plain rows) 4 times.
And remember, the best part is that there’s lots of different ways to solve the problem, and they are all correct! If you’ve covered the right distance, and you’ve got the right stitch count, it’s perfect.
You can use exactly the same method to accommodate a different row gauge in body shaping too–increases and decreases for waist, hip and bust. Heck, you can use this method to add body shaping to an otherwise straight garment. We’ll talk about that next time.
Thank you thank you thank you. Perfect timing as I endeavor my first drop sleeve pullover with a row count that’s more than specified. (I’m using an iPhone app which seems more like guidance than anything). I knew at some point there would be logic in how to adjust and even wondered what Kate Atherley would have to say 🙂
As we get older some of us (ahem) get a little lopsided. I can see eliminating those 4 leftover rows on my slightly shorter arm. Not visible to the naked eye (hopefully!) but I am often annoyed by sleeve cuffs that extend slightly past my wrist on my left arm. An unintended benefit. Kate, of your wonderful instructions! Thank you!
I do this a lot.
Many of us no longer have young, skinny arms or want a tight sleeve.
Something designers might just note, perhaps.
Thanks for codifying this!
This is so helpful, thanks. That said, it doesn’t matter what Kate’s articles are about. I see “Kate Atherley” & save it. Then I scroll down to read it.
I’m waiting for the article that shows how to convert dropped shoulders into set-in sleeves or as least minimize the drop! It’s just not the look for everyone but designers seem to love it.
Ooh yes, I want that one too!
A little trickier when working a color work yoke. I find I have to eliminate rounds in the chart.
Love when Kate Atherley is the columnist!
I often rework sleeves to make them slimmer from the underarm to elbow and ½”-1” shorter. When making changes I find that it is a good idea to treat a sleeve as two parts – underarm to elbow & elbow to cuff. If the sleeve is viewed as one entity the knitter can still end up with an ill fitting sleeve even after modifications.
I measure each section and work stitch/row adjustments to match my own arms. Speaking for myself alterations generally take place above the elbow but YMMV based on your own arms and the fit and length you desire.
“ it can be weirdly hard to match row gauge, even when you’re matching stitch gauge perfectly”. OMG, I never get row gauge! I wondered who are these knitters that can do that, for that matter the designer obviously gets the right gauge too. You’ve just released and freed my inner critical voice. Thank you for letting me know that I’m OK!
Agree. I think the focus on row gauge is overemphasized. Getting stitch gauge is important, but then you can do math to deal with the row gauge on most projects (but not all—those with unusual construction might be less forgiving.)
I like Kate’s general concept that if your row gauge is way off, then perhaps you’ve chosen a yarn that won’t really work for the particular pattern. Otherwise, don’t worry about the row gauge and use some math to make it work.
Thanks so much lots of frogging dismay frustration
Printed out and saved for next sweater
Clear as mud!
I’m messing around with this right now, not because of row gauge, the pattern helpfully put it in cms instead of rows (although I then translated it to rows) but in order to make it fit my arm width better. I love these columns!